
Why Is Your Bath Leaking? Causes, Checks and How to Fix It
Is your bath leaking underneath, around the edges or through the ceiling below? This practical guide for homeowners in Northamptonshire, including Wellingborough, Rushden, Kettering and Corby, explains how to identify likely causes, carry out safe checks and decide when to call a plumber.
A leaking bath can damage flooring, stain ceilings and create conditions where damp and mould develop. Common causes include a failed bath-to-wall seal, a leaking waste or overflow connection, a faulty tap connector or a damaged pipe. The right repair depends on where the water originates and when the leak appears.
Before replacing silicone or tightening fittings, identify the likely source. The checks below help you distinguish leaks associated with the taps, waste, overflow and bath seals, while explaining when a repair is suitable for DIY and when professional help is safer.
Quick Diagnosis: When Does Your Bath Leak?
Choose the symptom that most closely matches what you have noticed. These clues suggest possible causes but do not confirm a fault.
If water is spreading, the ceiling is bulging, or electrical fittings may be wet, do not continue testing. Stop using the bath and seek appropriate professional help.
Tools and Materials You May Need
You will not need everything on this list for every repair. Start with the basic diagnostic tools and use repair materials only after identifying the likely source.
- Kitchen roll or toilet paper for checking drips
- Torch for inspecting accessible pipework
- Bucket and old towels
- Screwdriver suitable for the bath panel
- Suitable spanner or grips for compatible fittings
- Replacement washer or seal matching the fitting
- Sanitary silicone suitable for baths and showers
- Sealant gun and masking tape
- Sealant remover suitable for the bath material
- Surface-compatible cleaning materials
Make It Safe and Stop the Water
Before investigating a leaking bath, prevent further water damage and make sure the area is safe to inspect.
- Stop using the bath, taps and shower until you have a better idea of where the leak is coming from.
- If water appears to be escaping from a supply connection, close the relevant isolation valve if it is accessible and safe to operate. If you cannot isolate the affected supply, use the main stopcock if you can reach it safely.
- The main stopcock is often under the kitchen sink, near the point where the water supply enters the property, or in another accessible service location. Locations vary between homes.
- If water is coming through the ceiling below, keep people clear of the affected area. Do not touch wet light fittings, switches or electrical equipment.
- Only switch off electricity at the consumer unit if you can reach it without approaching water or wet equipment. If it is wet or unsafe to approach, keep clear and contact a qualified electrician.
- Use towels or a bucket to contain water only where it is safe. Do not stand in water near electrical equipment.
Find Where the Leak Is Coming From
Different faults can produce similar damp patches. A careful inspection helps you distinguish a leaking supply connection from a waste, overflow or bath seal problem.
- Dry the accessible bath surfaces, taps, waste area and surrounding floor. If water is actively escaping or there is damage below, stop and arrange professional help rather than continuing the tests.
- Place small strips of kitchen roll near accessible connections, beneath the taps and around the waste. Keep paper away from electrical equipment and hot surfaces.
- If the area is safe and the water supply can be controlled, briefly run the taps with the plug out. Watch for the first sign of water beneath the tap assembly or at accessible pipe joints.
- If no leak appears, add a small amount of water to the bath while monitoring the waste outlet and the accessible area beneath it. Stop if any leak develops.
- If the bath remains dry, increase the water level gradually while watching for leaks. Filling to just below the overflow does not test the overflow connection itself.
- Only if the earlier checks remain dry and it is safe to proceed, allow water to enter the overflow opening while monitoring its accessible connection. Stop immediately if water appears outside the intended drainage route.
- If the bath remains watertight, release the water and watch the waste and trap connections while it drains. A leak that appears only during draining may indicate a waste or drain connection problem.
- If the leak appears only after showering, inspect the accessible bath-to-wall seal, grout and shower fittings. Do not spray water near electrical equipment or deliberately soak a suspected leak area.
The first place where water appears is a useful clue, but water can travel along pipework, flooring and the underside of the bath before becoming visible. A damp patch does not always sit directly beneath the fault.
Leaks when the bath fills or drains
A leak during filling may point to the waste outlet, a tap connection or, if the water reaches the opening, the overflow assembly. A leak that appears mainly during draining may involve the waste, trap or drain connection. Check when the leak starts rather than assuming every leak beneath the bath has the same cause.
Leaks when the taps or shower are running
Water appearing beneath the taps may indicate a leaking tap tail connector, supply joint, tap body or shower diverter. A drip from the spout after the tap is turned off may instead be caused by a worn washer or cartridge. These faults require different repairs.
Water escapes around the bath after showering
Possible causes include a cracked or detached silicone seal, damaged grout, gaps around shower fittings or water escaping past a shower screen. Inspect visible joints and seals. Replace silicone only if the seal is defective or there is good evidence that water is passing through it.
A crack or crazing in the bath itself
Inspect visible surfaces for cracks, particularly around the waste and base. Do not press, stand on or deliberately flex a damaged bath to test it. A leaking crack, split, unstable base or excessive movement needs professional assessment before the bath is used again.
Constant dripping when the bath is not being used
A continuous leak may come from a pressurised water supply, a nearby heating pipe or another plumbing fixture. The bath may not be the source at all. Isolate the relevant water supply if safe and possible, and arrange an inspection if the leak continues or the source is unclear. You may also find our guides to leaking pipe repair and burst pipe repair useful.
Fix the Leak at the Source
Only attempt a repair when you have identified a likely cause, can safely access the fitting and know how it is designed to seal. A bath panel may provide access to the pipework, but its fixing method varies between installations.
Leaking waste or overflow
- Stop using the bath and ensure the relevant water is no longer entering the waste or overflow. Keep the area below accessible for inspection.
- Inspect the accessible waste, trap and overflow connections with a torch. Do not loosen a connection while water is flowing through it.
- If a compatible slip nut is visibly loose, follow the fitting manufacturer's instructions and tighten it carefully. Do not assume every fitting needs an additional quarter turn, and avoid overtightening plastic components.
- If a joint continues to leak, the washer, seal or fitting may be damaged or incorrectly seated. Replace parts only with compatible components and refit them according to the manufacturer's instructions.
- A leak around the plughole may involve the waste body's seal against the bath as well as the connection underneath. If the waste assembly needs removal, take care not to damage the bath or drainage fittings. Seek professional help if access is difficult or the fitting is corroded.
Leaking tap connectors or tap body
- Isolate the relevant water supply before opening any plumbing joint. Operate the taps only as appropriate to relieve residual pressure, and be aware that hot water may remain in the pipework.
- Inspect accessible tap connectors and joints for signs of moisture. A leaking connection may need a replacement washer, O-ring, connector or damaged fitting rather than additional tightening.
- Use a replacement washer or seal that matches the specific fitting. Do not assume every flexible hose or tap connector contains a replaceable fibre washer.
- A dripping spout may indicate a worn washer or ceramic cartridge, depending on the tap design. Follow the manufacturer's repair instructions or use a plumber if the mechanism is unfamiliar. See our tap repair service for further assistance.
- Use PTFE tape only on joints designed to seal through their threads and where the fitting manufacturer recommends it. Do not add tape indiscriminately to compression fittings, O-ring connections or joints that seal with a washer.
Small crack or surface damage in an acrylic bath
- Stop using the bath if a crack is leaking or the base feels unstable. Water can escape beneath the surface even when a crack looks small.
- A compatible repair kit may be suitable for minor cosmetic surface damage if the bath manufacturer permits that type of repair. Follow the kit instructions and prepare the surface as specified.
- Cracks around the waste, leaking splits, structural damage, significant flexing or a poorly supported bath need professional assessment. Replacement may be necessary, but the correct solution depends on the bath material, the damage and the supporting structure.
Reseal the Bath Properly
A failed bath-to-wall seal can allow splashed or shower water to pass behind the bath and damage surrounding materials. Resealing is appropriate when the existing seal is cracked, detached, deteriorated or otherwise identified as the likely source of water ingress. It will not repair a leaking waste, overflow or supply pipe.
- Check the bath and sealant instructions. Confirm that the new sanitary silicone is suitable for the bath material, tiles and intended joint. Follow the manufacturer's instructions for bath loading during application and curing.
- Prepare the area. Stop using the bath and remove the old silicone carefully with a suitable sealant remover or scraper. Avoid scratching the bath, damaging the tiles or cutting into concealed pipework.
- Clean and dry the surfaces. Use a cleaner compatible with the bath, tiles and selected sealant. Do not use white spirit or another solvent unless the manufacturers confirm it is suitable. Remove all residue and allow the joint to dry completely.
- Position the bath as instructed. Some installations require the bath to be filled before sealing to account for movement under load. Follow the bath and sealant manufacturers' guidance rather than assuming every bath should be filled in the same way.
- Apply the silicone. Use masking tape if needed to create a neat edge. Apply a continuous bead of suitable sanitary silicone, ensuring the joint is properly filled. Smooth it using the sealant manufacturer's recommended method and remove masking tape before the silicone skins over, if the product instructions advise this.
- Allow it to cure fully. Keep the bath in the specified position and avoid water exposure until the sealant has cured for the period stated on the cartridge. Do not assume every product is ready for use after 24 hours.
Test the Repair Carefully
Once the repair is complete and any sealant has cured, test the affected component in a controlled way. Do not recreate a condition that previously caused significant water damage.
- If you isolated the water supply, reopen the relevant valve slowly when it is safe to do so. Check the joints you worked on for moisture.
- For a tap connection repair, run the affected tap briefly while checking the accessible connection. Stop if water appears.
- For a waste or trap repair, add a small amount of water first and inspect the joint. If it remains dry, increase the amount gradually and check again while the bath drains.
- For an overflow repair, test the overflow only when it is safe and you can monitor the connection. Stop immediately if water escapes.
- For a resealed bath, wait until the sealant has fully cured before exposing it to water. Then check for leaks during normal use without deliberately soaking the surrounding area.
- Inspect the accessible pipework, surrounding floor and ceiling below, if applicable. Some leaks appear only after water has travelled through the structure, so check again later.
- Refit the bath panel only when the relevant connections have been checked and the repair remains dry. If you need further monitoring, leave safe access available.
If the leak returns, the original diagnosis may have been incomplete or another fault may be present. Stop using the bath if necessary and arrange a professional inspection rather than repeatedly tightening fittings or applying more silicone.
When to Call a Plumber Instead
Some minor repairs are suitable for competent DIYers. A professional should inspect the problem when the source is uncertain, the fitting is difficult to access or the repair could cause further damage.
Water through a ceiling
Stop using the bath and keep clear of the affected area. Water near electrical fittings needs particular caution. Do not touch wet electrical equipment.
Heavy or continuous leaks
Isolate the relevant water supply if it is safe and possible. If water continues to escape or the source is unclear, arrange urgent professional assistance.
Corroded or seized fittings
Old or damaged connections can break when forced. A plumber can assess whether the fitting can be repaired or needs replacement.
Cracked or unstable bath
A leaking crack, significant movement or damaged support may require specialist repair or replacement before the bath is used again.
Repeatedly failing repairs
If the leak returns after a repair, the fault may be elsewhere or the underlying cause may not have been addressed.
Damp, soft flooring or mould
Persistent moisture can damage floorboards and other building materials. The source needs to be repaired, and affected materials may need further assessment.
For help diagnosing a persistent leak, see our water leak repair service. If the bath is damaged beyond practical repair, our bathroom fitting team can discuss replacement options. Ask us to confirm the terms and coverage of any applicable guarantee before booking.
Bath Beyond Repair? Explore Replacement Options
A replacement may be worth considering if the bath has structural damage, persistent leaks caused by deterioration or support problems that cannot be resolved economically. The best option depends on the bath's condition, the source of the leak and the cost of repairing the surrounding area.
Explore examples of local work, including a small bathroom refurbishment in Wellingborough, a bathroom fitting in Kettering and a bathroom installation in Corby. If you are considering spreading the cost, read the details of our finance options and check the applicable terms before proceeding.
Leaking Bath FAQs
Why is my bath leaking underneath?
Possible causes include a leaking waste or trap connection, a faulty overflow seal, a leaking tap supply connection or water passing behind a damaged bath-to-wall seal. The timing of the leak helps narrow down the source, but water can travel before becoming visible. Stop testing if water is causing damage or the source cannot be safely monitored.
Can I fix a leaking bath drain myself?
Some accessible leaks caused by a compatible, replaceable washer or a loose slip nut may be repairable by a competent DIYer. Isolate the relevant water where necessary, avoid overtightening and follow the fitting manufacturer's instructions. A leaking waste seal, damaged assembly, corroded fitting or inaccessible connection may need a plumber.
How long should silicone cure before I use the bath?
Follow the curing time stated on the sealant cartridge. Some products need around 24 hours, while others require longer depending on the product, joint thickness and conditions. Keep the bath in the position specified by the manufacturer during curing, and do not expose the seal to water before it is ready.
Can a leaking bath damage the ceiling below?
Yes. Water can stain ceilings, damage plaster and flooring, and contribute to mould and timber deterioration. If water appears through the ceiling, stop using the bath, keep clear of potentially unsafe areas and treat nearby electrical equipment as a hazard. Arrange appropriate professional assistance.
Should I reseal the bath if the leak is coming from a pipe?
No. New silicone will not repair a leaking pipe, waste connection or tap supply. Reseal only when the bath-to-wall joint is damaged or there is good evidence that it is allowing water through. Diagnose and repair the actual source first.
Can I use PTFE tape on a leaking bath fitting?
Only if the joint is designed to seal through its threads and the fitting manufacturer recommends PTFE tape. Compression fittings, O-ring connections and joints that seal with washers generally need their intended sealing method checked instead. Applying tape to the wrong joint may not stop the leak.
When should I call a plumber for a leaking bath?
Arrange professional help if the leak is heavy or persistent, water reaches the ceiling below, fittings are corroded or inaccessible, the bath is cracked or unstable, or the leak returns after a repair. If water may have reached electrical equipment, keep clear and seek appropriate electrical assistance.
Do you repair leaking baths in Wellingborough and nearby towns?
Normz Plumbing lists services covering Wellingborough, Rushden, Kettering, Northampton, Corby, Thrapston, Finedon, Earls Barton, Higham Ferrers and the wider North Northamptonshire area. Contact the team to confirm availability for your address and the type of repair required.
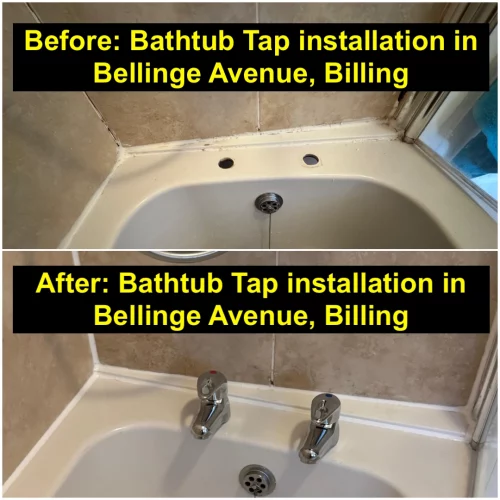
Our Previous Bath Tub Repairs in Northamptonshire



What our customers say about Normz Plumbing
Choosing a plumber is easier when you can read feedback from previous customers. Explore reviews of Normz Plumbing & Heating Services and learn about other customers’ experiences.
EXCELLENTTrustindex verifies that the original source of the review is Google. Easy to book, did a great job of a tricky tap fit.Posted on GoogleTrustindex verifies that the original source of the review is Google. Great service, came out when arranged. Top job sorting a replacement sink and fit for usPosted on GoogleTrustindex verifies that the original source of the review is Google. Amazing same day service… called in a panic as having squeaky floorboards sorted and the pipes popped up above the floor level, ran the whole length of house with off shoots everywhere, carpenter thought it may mean entire new pipework…. Plumber arrived within a couple of hours, quickly found a much cheaper solution, he was so professional and I instantly knew he understood the issue, sorted within an hr, and the bill was extremely reasonable..wouldn’t hesitate to recommend this company … excellent thank youPosted on GoogleTrustindex verifies that the original source of the review is Google. Had a bathroom refurbishment done was a very good job done took about 2 weeks all together everything was gutted out and was kept informed of everything that was happening even in the evening,left the key with them and it was still safe would recommend them for any plumbing issuesPosted on GoogleTrustindex verifies that the original source of the review is Google. Water gushing through the ceiling. Rang them and they came out within 20 minutes by which time we had turned the water off. Not only did he solve the problem. He also gave us some advice, having been into the loft, to make our house warmer in the winter which we appreciated.Posted on GoogleTrustindex verifies that the original source of the review is Google. Extremely helpful. Excellent service on fitting our new shower. Definitely recommend this team.Posted on GoogleTrustindex verifies that the original source of the review is Google. Replaced a leaking shower body assembly. Punctual, polite, efficient, good value and took away the old part for us. Would recommend!Posted on GoogleTrustindex verifies that the original source of the review is Google. Communication was easy via WhatsApp. I got the replacement taps I wanted in my kitchen sink and bathroom sink. On the day, I wasn't sure when the plumber was coming but when her did come the work was done quickly and neatly.Posted on GoogleTrustindex verifies that the original source of the review is Google. Amazing!! Our bathroom has been fitted to a high standard. The team never regarded anything as a problem—every issue was met with a practical solution. The guys were a pleasure to deal with and we wouldn't hesitate to recommend them to anyone wanting a polite, efficient, and professional team doing any works. Very happy!!Verified by TrustindexTrustindex verified badge is the Universal Symbol of Trust. Only the greatest companies can get the verified badge who has a review score above 4.5, based on customer reviews over the past 12 months. Read more
Still Leaking? Let a Local Plumber Sort It
If the DIY fix didn't hold, or you'd rather not take the bath panel off, call Normz Plumbing & Heating Services. We repair leaking baths, taps and pipework for homes across Wellingborough, Rushden, Kettering, Northampton, Corby and the surrounding villages, with a fixed-price quote before we start.